Description
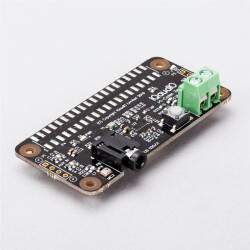
A super-simple, slimline way to hook up a 3W speaker to your Raspberry Pi! Output punchy digital I2S audio whilst leaving your GPIO pins conveniently accessible.
SHIM is a old Yorkshire term meaning 'Shove Hardware In Middle' - we use it for Raspberry Pi add-ons that are designed to be sandwiched between your Pi and a HAT or mini HAT. This one has a clever friction fit header which slips handily over your GPIO pins, doesn't need soldering* and is easily removable.
The MAX98357A combined DAC / amplifier chip takes high quality digital audio from your Pi and amplifies it so it can be used with an unpowered speaker. The push-fit connectors make it straight-forward to connect up your speaker, whether it's a bookshelf or floor-standing speaker, the speaker in an old radio, or a teeny tiny mini speaker.
Because Audio Amp SHIM adds no extra bulk to your Pi it's perfect for building into a compact enclosure - you could use it to make a tiny MP3 player to play local files or stream from services like Spotify, give a vintage radio the ability to play digital radio streams or incorporate bleepy noises into your very own retro handheld. It's also a handy way to add an an audio output to your Pi Zero or Pi 400!
Please note that Raspberry Pis and speakers are not included with this board - check out the extras tab for compatible ones!
Features
- MAX98357A DAC / amplifier chip (datasheet)
- Mono 3W audio out
- Push-fit speaker terminals
- SHIM-format board with friction-fit connectors
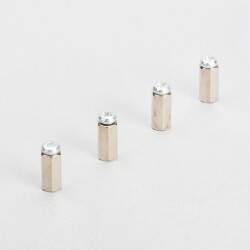
- 2x mounting holes (M2.5) for if you want to secure everything together with bolts
- Fully-assembled
- No soldering required (*unless you're using a Pi that comes without a header)
- Compatible with all 40-pin header Raspberry Pi models
- Dimensions: 63.3 x 15.2 x 5.4mm (L x W x D, including speaker connector)
Software
The easiest way to get everything set up is to to use our Pirate Audio software and installer which configures I2S audio, as well as installing Mopidy and our custom Pirate Audio plugins which will let you stream Spotify and play local files.
Here's how to get started:
- Set an SD card up with the latest version of Raspberry Pi OS.
- Connect to Wi-Fi or a wired network.
- Open a terminal and type the following:
git clone https://github.com/pimoroni/pirate-audio

cd pirate-audio/mopidy

sudo ./install.sh - Reboot your Pi
You can find more detailed instructions here: https://github.com/pimoroni/pirate-audio/tree/master/mopidy or get tons more info in our Getting Started with Pirate Audio tutorial.
Alternatively, if you'd rather not install all the Mopidy stuff, you can set Audio Amp SHIM as your default Alsa device in Raspberry Pi OS by adding the following line to your /boot/config.txt file: dtoverlay=hifiberry-dac
If you're using a Pi that has an audio jack you might also need to disable onboard audio by adding a # to the beginning of the following line (this can help applications find the correct audio device automatically)
#dtparam=audio=onNotes
- You can use an Audio Amp SHIM with HATs and mini HATs without a booster header, as long as they don't have any chunky components on the underside (it's a good idea to check there are no metal components on the underside of your HAT that touch the metal components on the top of the SHIM).
- If you want to use one with a Pibow Coupé case (either for the Zero / Zero W or Pi 4), then you'll need to use a booster header to raise it up a little.
- If you're planning on using Audio Amp SHIM to add an audio output to your Pi 400, you'll also need a booster header. If you're plugging it directly into the back of a Pi 400, bear in mind that the SHIM should be upside down, with the mounting holes at the bottom. Alternatively, you could plug it in via a Flat HAT Hacker (in which case you won't need a booster header or to plug anything in upside down).
- Maximum wire size for the push fit connectors is 0.75mm² (1mm diameter, 18AWG).You'll need tinned ends on your speaker wires, so that they are stiff enough to push into the connectors (all the speakers we sell have tinned wires).
- Audio Amp SHIM uses GPIO 18, 19, and 21 (as well as 3.3v, 5v and ground). If you're planning on using it in conjunction with other boards you'll need to check for pin conflicts using pinout.xyz.

